Chimney flashing repair fixes the metal and sealed joints where your chimney meets the roof, but the repair depends on where the water is actually getting in. A loose section of counterflashing may need a targeted repair, while corroded metal or poorly installed flashing may call for partial or full replacement.
That distinction matters because a leak beside the chimney does not automatically mean the entire flashing system has failed. If the problem extends to the surrounding roof, it also helps to understand how flashing fits into a complete roof installation before comparing a contractor’s proposed scope.
Chimney flashing is the water-shedding system at the joint between the roof and chimney. Its job is to direct rain and melting snow away from a place where two very different surfaces meet.
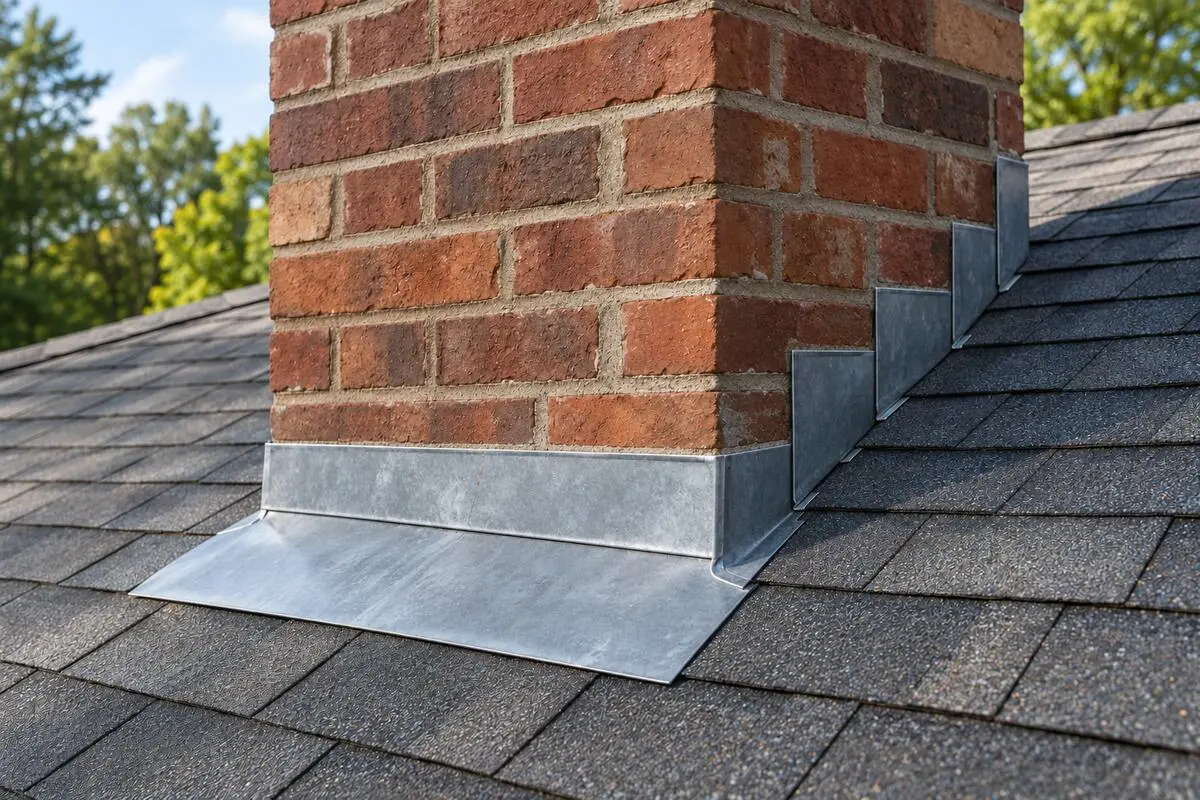
On a typical asphalt-shingle roof, step flashing is often woven into the shingle courses along the sides of the chimney. Counterflashing overlaps that roof-side flashing and is attached to, or integrated with, the chimney. The exact detail changes with the roofing material, chimney construction, roof slope, and local requirements, so don’t treat this asphalt-shingle arrangement as universal.
Flashing is commonly made from aluminum, galvanized steel, or copper. Copper naturally changes color as it weathers. Its brown, gray, or green patina is not the same as rust and can form a protective surface layer.
It also helps to separate flashing from other chimney parts. The chimney crown protects the top of a masonry chimney, while a chimney cap helps keep rain, debris, and animals out of the flue opening. A problem with either one can create moisture symptoms that look like a flashing leak.
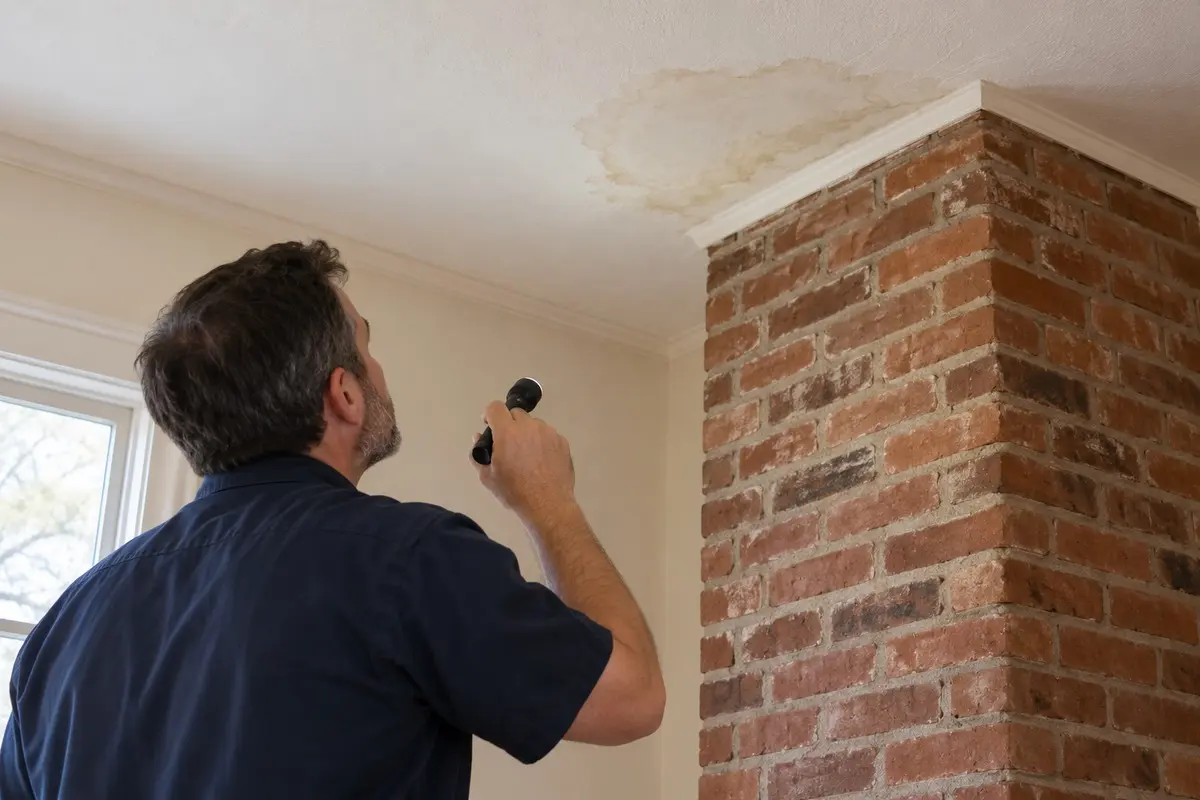
Water stains near a chimney often point homeowners toward the flashing, but the source may be elsewhere. From inside the home or from ground level, watch for:
Damaged shingles nearby can contribute to a roof leak, but they do not prove the chimney flashing has failed. Water may also enter through deteriorated flashing, a cracked crown, damaged masonry, or another opening before showing up inside the home.
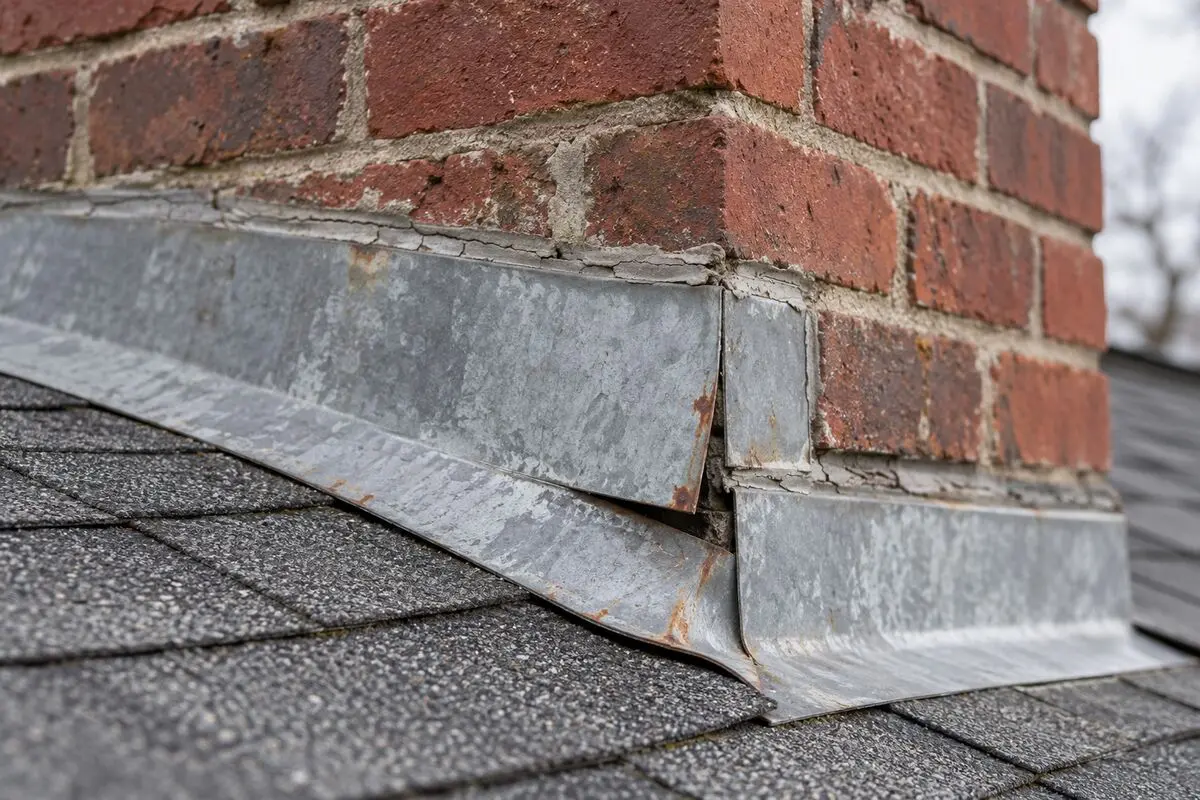
Treat stains as evidence of a moisture problem, not a diagnosis. Document when they appear, photograph visible damage from a safe location, and leave roof-level inspection to someone with proper access and fall-protection equipment.
Not every flashing problem calls for a complete tear-out. The contractor should base the recommendation on what the inspection shows, including the condition of the metal, how the flashing was installed, and whether the surrounding roof or masonry has been damaged.
| Option | When It May Be Appropriate | What the Work May Involve |
| Localized repair | Flashing is generally sound, but a limited joint, attachment point, or small section has failed | Resealing a specific joint, securing loose metal, or repairing or replacing a limited flashing section |
| Partial replacement | One or more flashing components are damaged while the rest of the system remains serviceable | Removing roofing as needed to replace affected step, apron, back, or counterflashing components |
| Full replacement | Metal is extensively damaged, installation is defective, or multiple parts of the assembly no longer manage water correctly | Removing the existing flashing as needed, inspecting nearby materials, installing a new flashing assembly, and restoring roofing around the chimney |
Age alone is not enough to decide. A newer system can leak if installed poorly, while older flashing may still perform well.
Sealant can have a valid role at specific joints, but it cannot replace the layered metal system that moves water away from the roof-chimney intersection. Step flashing and counterflashing work together around the chimney to direct water away from the roof-chimney joint.
A localized professional chimney flashing repair can cost about $200 to $500 per chimney for minor resealing or patching. More extensive replacement can run about $400 to $1,300 per chimney when substantial sections or the full flashing system need replacement. These are estimated professional project totals, including labor and materials. Larger or more complex jobs can cost more.
Scope differences matter when comparing quotes. Resealing a failed joint or securing a loose section of flashing is a much smaller job than removing roofing and replacing several flashing components. Two contractors may quote very different prices because they are recommending different levels of repair.
Several factors can affect the final cost:
A chimney flashing quote may not include chimney repointing, crown repair, roof-deck replacement, insulation, drywall, paint, mold treatment, or repairs to interior water damage. Check the written estimate to see what is included before comparing prices.
If the inspection reveals a larger roofing project than expected, roof financing may help spread the cost over time. Renovate is not a lender, and financing approval is not guaranteed.
A good repair starts with finding the leak path by checking the flashing, nearby roofing, masonry, crown, attic area, and visible water patterns.
Once the contractor identifies the likely source, they expose only the area needed. A limited failure may involve one loose section, while wider damage may require removing nearby roofing to inspect the flashing underneath.
Surrounding materials matter too. Soft decking or deteriorated masonry needs separate attention, not just a new metal cover.
After the damaged components are repaired or replaced, the roofing is restored around the chimney so water sheds down the roof rather than working behind the flashing. This is also where roof flashing installation details matter. The metal, roofing, masonry, and sealed joints must work together.
When you compare estimates, focus on the proposed diagnosis and scope, not just the total at the bottom of the page.
Look for a contractor with experience working on chimney flashing and your specific roof material. Ask for proof of insurance, any license required in your state or municipality, and examples of similar work. If you also need masonry repairs, ask whether the roofer handles that work or whether a mason will be involved.
Once you receive an estimate, check that it clearly explains the proposed repair and breaks down the cost. It should include:
The goal is to understand both what the contractor plans to do and what you are paying for. For example, “repair chimney leak” is too vague. An estimate that identifies failed counterflashing, lists the repair work, and explains how unexpected damage will be priced is much easier to compare with another quote.
If more than one trade is involved, confirm who is responsible for the finished waterproofing detail. Homeowners who need help finding a roofer can submit a request for roof repair services through Renovate.
You do not need to walk the roof or reseal the chimney every year to stay ahead of problems.
The Chimney Safety Institute of America recommends annual chimney inspections. When scheduling one, ask whether the assessment includes the roofline flashing, chimney crown, and other visible exterior components. A roof inspection checklist can also help you track what to review after storms or when new moisture appears.
From a safe location, look for changes after severe weather, such as lifted metal, missing roofing, or new interior stains. Have a professional remove roof debris rather than climbing up yourself. New stains deserve attention even if they seem small.
When scheduling repairs, ask the contractor what weather conditions are needed and how they’ll protect the area if rain arrives before the permanent repair is complete. That is more useful than waiting for a particular season.
A leak near the chimney is a reason to investigate, not a reason to assume every piece of flashing needs replacement. Document when and where you see moisture, then request an assessment that identifies the likely entry point and spells out the repair scope.
Renovate can help you connect with a local roofing contractor so you can discuss the problem and review the proposed work before deciding how to proceed.
Some small sealing jobs may seem manageable, but finding the real source of a chimney leak is not always that simple. Water can enter in one place and show up somewhere else. Since flashing work also involves the roof, it is usually safer to have a professional inspect the area first.
Caulk can help when the problem is limited to a small failed joint and the flashing itself is still in good condition. It will not solve issues such as missing metal, heavy corrosion, loose flashing, or poor installation. In those cases, adding more sealant may only delay a proper repair.
Not necessarily. Ask the contractor to inspect the existing flashing and explain whether it can stay, needs repair, or should be replaced. Ask what the roofing estimate includes and why. Its condition, installation, and compatibility with the new roof matter more than age alone.
It makes sense to have the flashing checked during your yearly chimney inspection. Also check after strong storms or if a new stain appears near the chimney. Catching a loose section or damaged joint early can help prevent water from reaching the roof deck or interior finishes.
How long a repair lasts depends on what was fixed and the condition of the remaining flashing. Resealing a joint is not the same as installing new metal. Weather exposure, roof movement, materials, and workmanship all affect the result. Ask the contractor what warranty applies to the specific repair.